Showing posts with label DIY bracelet. Show all posts

Thursday, 5 July 2012


DIY Hand Harness


My new jewellery obsession is hand harness's. These are basically a ring and a bracelet that you wear that are connected together by a chain. They are so pretty and delicate and I think they add a perfect touch of glam to your outfit :) I brought my hand harness from Topshop for £15 (ouch but I am jewellery crazy) only for it to promptly snap in two about two weeks later. The chain always used to come away from the ring, which was annoying, but fixable, and now the actual bracelet itself has snapped  (typical Topshop value for money) I was going to take it back but they don't have any in my local branch so I'm going to see if I can fix somehow.
In the mean time I thought I'd see if I can make my own
They were actually so easy to make, and look so lovely I thought I would share how to make them
:) 


You will need


Chain 
(I recommend getting a cheap necklace from Primark or using an old necklace)
Pliers
Charms to add your bracelet
Hook and clasp - if you are just using a length of chain that doesn't have one
These are easy to take from old jewellery though


Start by measuring out a length of chain that will sit against your wrist. You
want it so that it sits quite tight against your wrist without much slack, as otherwise it will fall across the back of your hand and your chain that connects to your ring will sag and look wrong.
Using your pliers add the clasp and the hook to either end


Next you need to take another length of chain and attach this using your pliers to your bracelet. This will form the harness part of the bracelet that fall across the back of your hand. It is easier if you do the bracelet up first so you can see where you need it to sit. Either attach it using the end loop on the chain (just prise it gently open with the pliers) or use another hoop from the end of a bracelet to attach it


Try it on at this point just to make sure that everything is fitting and the length of chain is long enough across your hand :)


Try out some charms positioning them on the bracelet so you can see what you like best, without committing yourself to attaching them. You can either attach charms to the bracelet bit or the chain in the middle. Just bear in mind that if you attach something to the chain that lies against the back of your hand, if its too heavy it will pull the bracelet out of shape and annoy the hell out of you when you try to wear


Once your happy with your charm attach it your bracelet. Take the length of chain attached to it and wrap it around your finger. This will form the ring. You want this to be fairly tight or it will slide up and down your finger when its on. Cut the chain and fasten the ring bit together.

*You can substitute this for an actual ring if you have one, but I didn't have any spare ring backs*


You should have something that looks like this


Attach the ring to the chain using your pliers


Voila! :)
I added a bead to the ring to jazz it up a little. You don't have to do this, 
they look just as nice with a simple chain


If you like this style of bracelet I would really recommend
you make your own as they are so easy to do, cheap, and the Topshop ones 
snap ;)

x x x x

Wednesday, 9 May 2012


Topshop DIY


I love jewellery and Topshop has always been one of the places that I loved to shop from to pick up new pieces. The only issue that I have with Topshop is that is sooo expensive for what it is! Last summer they were selling these really pretty flower bracelets made from twine/rope and fake flowers that I fell in love with. I brought one even though it was £8 (seriously? for some fake flowers and rope?) and then two days later it promptly fell apart and I had to exchange it. The second one that I brought also ended up breaking about a week later so I decided that I would have a go at making my own. 
They are really easy to do and so pretty for the summer :)


What you will need 


Twine (I got mine from a garden centre)
Scissors.
Fake flowers (Available from places like hobby craft or fabric stores)
Needle (Make sure the eye is fairly big)

To start with measure out a length of twine that will sit comfortably around your wrist (don't measure it tight to as you tie these on and will end up not leaving enough to fasten it) Add about another 5-7 inches of twine and cut it. (The extra length is so you can create the knot and the loop at either end)
Tip: If you are not sure how much to leave always measure a bit more as you can cut the excess off after if its too long


Measure the exact same length out another 5 times (so you have 6 individual strands) and then secure them tightly at the top by wrapping a separate piece of twine around all 6 pieces. Knot it securely otherwise it will unravel when you wear it. You will need to make quite a thick knot so that the loop won't slide off when you fasten it.


Separate the strands in to three separate strands of two and start plaiting 


When you get towards the bottom of the twine check that there is enough of the plaited section to sit around your wrist to form the bracelet.  Then take one section of your stand and make a loop at the bottom of the bracelet. Using the other two strands, wrap them tightly around the loop ( make sure you have left some twine at the bottom of your loop so that you can flatten it against the plaited section to secure it) and tie firmly in place. 


You should have something that looks like this. Try it on and test that the knot is thick enough to secure the loop otherwise it will slide off when you wear it. Its important that you tie the loop and knot as tight as you can otherwise they will unravel.


Choose what coloured flowers you want to use on your bracelet. You can either use small fabric flowers like these or paper ones.


If you choose the fabric flowers you will need to cut a piece of twine and unravel it so that you have very thin strand. Thread it through your needle and tie a knot in the other end.


Start sewing your flowers on to your bracelet :)


If you go for paper flowers these are easier to attach as you can simply weave them through your plaited section on your bracelet until they are securely in place and then cut off the end.

Voila! :)


love and kisses 

x x x x


Tuesday, 2 August 2011


This charming thing


I love reading posts about fashion DIY. Some of the things I've seen on line recently are so gorgeous and professional looking they could belong in a shop. The great thing about DIY is that you can put your on spin on it so no one else will have one exactly like it :) And as much I love shopping I think you treasure things that you make yourself and it means more to you.
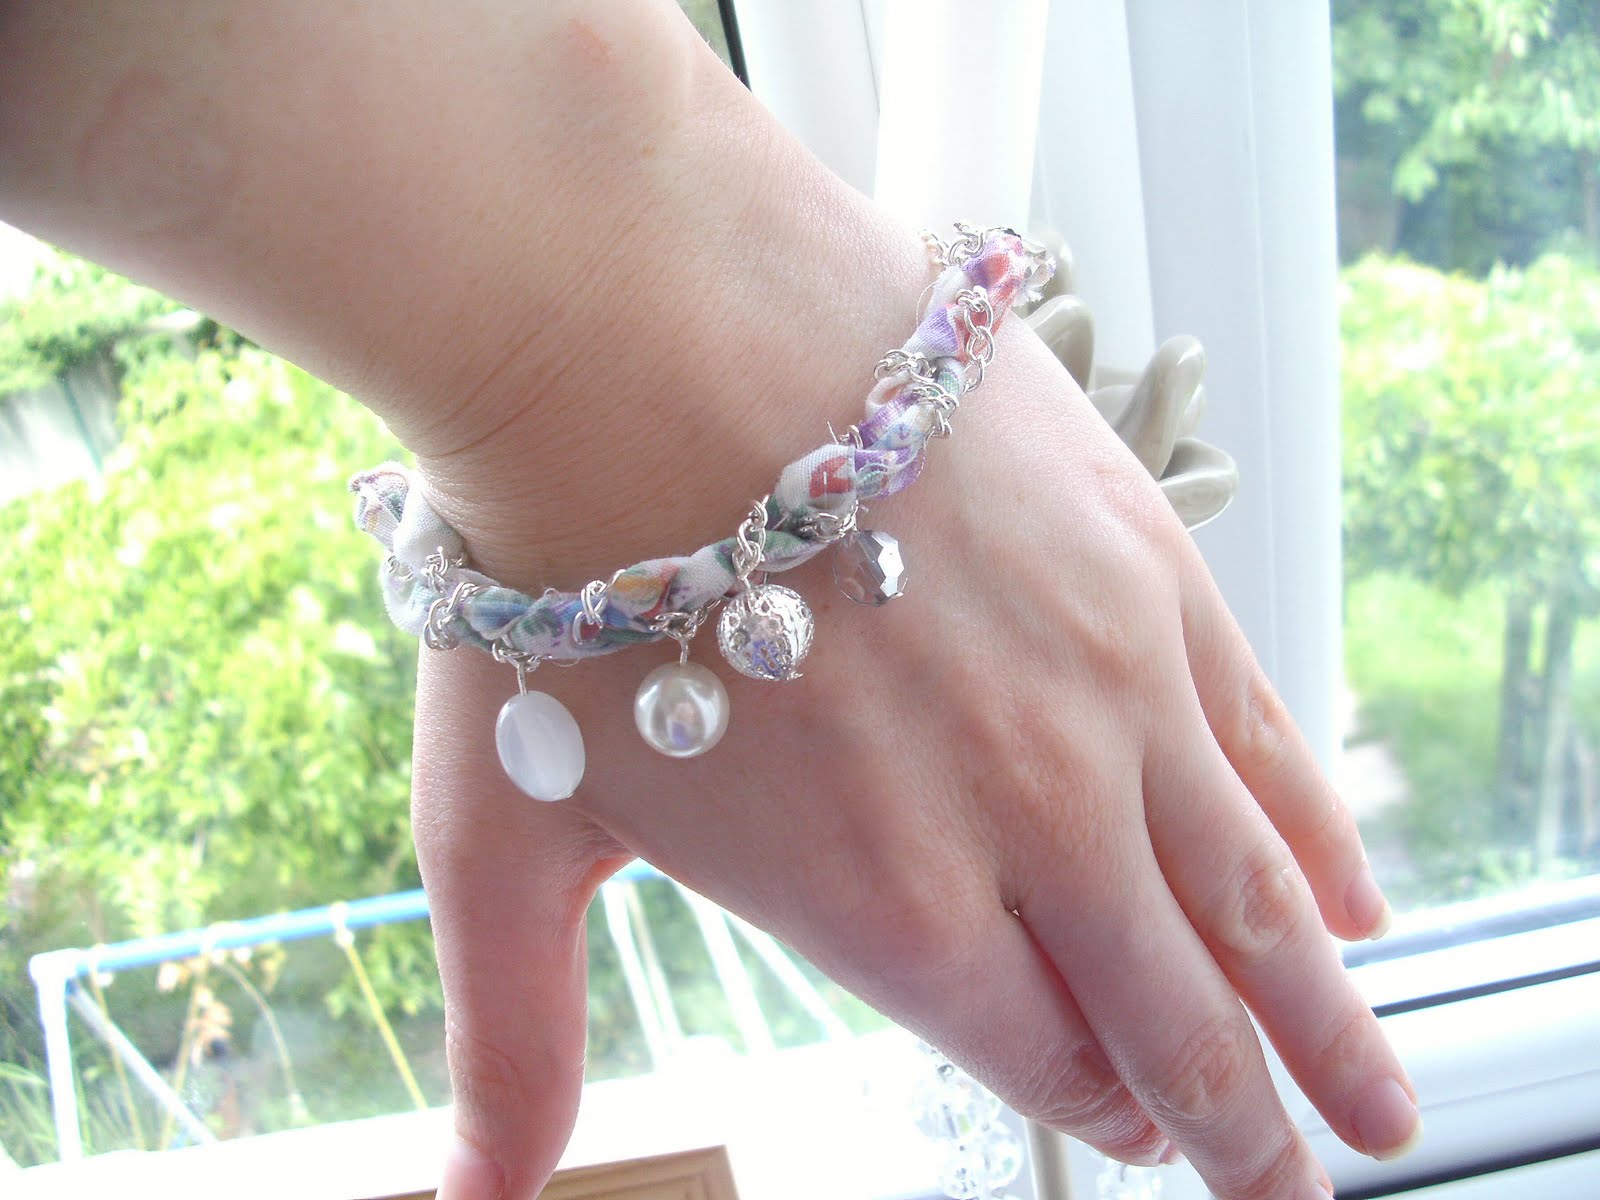
If you read my blog regularly you will know that I have an obsession with jewellery and recently started making my own. I love making things and I love all the creative fashion inspiration thats about so I thought I would do this post and share how I made these fabric charm bracelets


Materials


You will need
Scissors. Preferably fabric scissors, but it doesn't matter if they're not
Jewellery pliers or normal pliers. A normal pair of scissors will probably work but be careful nothing flies off in your face as its harder to cut the mental links using scissors
Fabric of your choice. Lace is quite pretty if you have some
A chain. You can get a meter length from places like Hobby Craft if you want to make a few to wear, other wise an old chain you don't use any more will be fine.
Eye and clasp You can use a clasp off an old necklace, but for the 'eye' bit you will need one of these to secure the fabric. I would imagine they're easy enough to pick up in a local craft shop, you can also find them on another necklace you could use, but careful you don't accidentally snap it when you use the pliers to take it off 
Start by measuring the chain around your wrist to get the length you want
Cut it using the pliers
Then measure the fabric to the same length and cut a strip off.
You can have your fabric any width you like, I cut mine about half an inch to an inch wide
You will need to cut at least two strips so you can plait it with the chain but you can cut more if you want it to be thicker

Put the lengths of fabric and chain together. In the bracelets pictured above I used two strips of fabric but for this one I'm using 5 strips plus the chain


Start plaiting


Secure one of the ends with the eye. Slide the fabric in the eye and use the pliers to push one side down and then the other. Its quite fiddly but doesn't take long when you get the hang of it :)


Tie the other end securely together. Cut the ends off

Add your clasp to the other end of the chain using the pliers/scissors
Start adding your charms to it :)
If they don't already have links on them you can use cut some of the links
from the left over bit of chain to attach them


Snip any loose threads off if you need to. I didn't with the first three I made but with this one depending on your fabric it may fray easily and you may need to neaten the edges up


Voila!

If you love DIY posts I seriously suggest that you check out this lovely  Lady's blog.
aboutlovemaegan.blogspot.com 
I've just spent the last half an hour lusting after her DIY creations. They are endless and she is very talented you will not be disappointed!
love and kisses

x x x x